How to Create a ClickUp Client Portal in 60 Seconds
You run projects in ClickUp. Your clients want to know how those projects are going. The obvious move is to share your workspace, but that drags clients into an interface built for your team and risks exposing work they should never see. A ClickUp client portal solves this: a branded, password-protected page that shows each client their project, read live from ClickUp, with no account required.
This guide explains what a ClickUp client portal is, why sharing access falls short, and how to create one in about a minute.
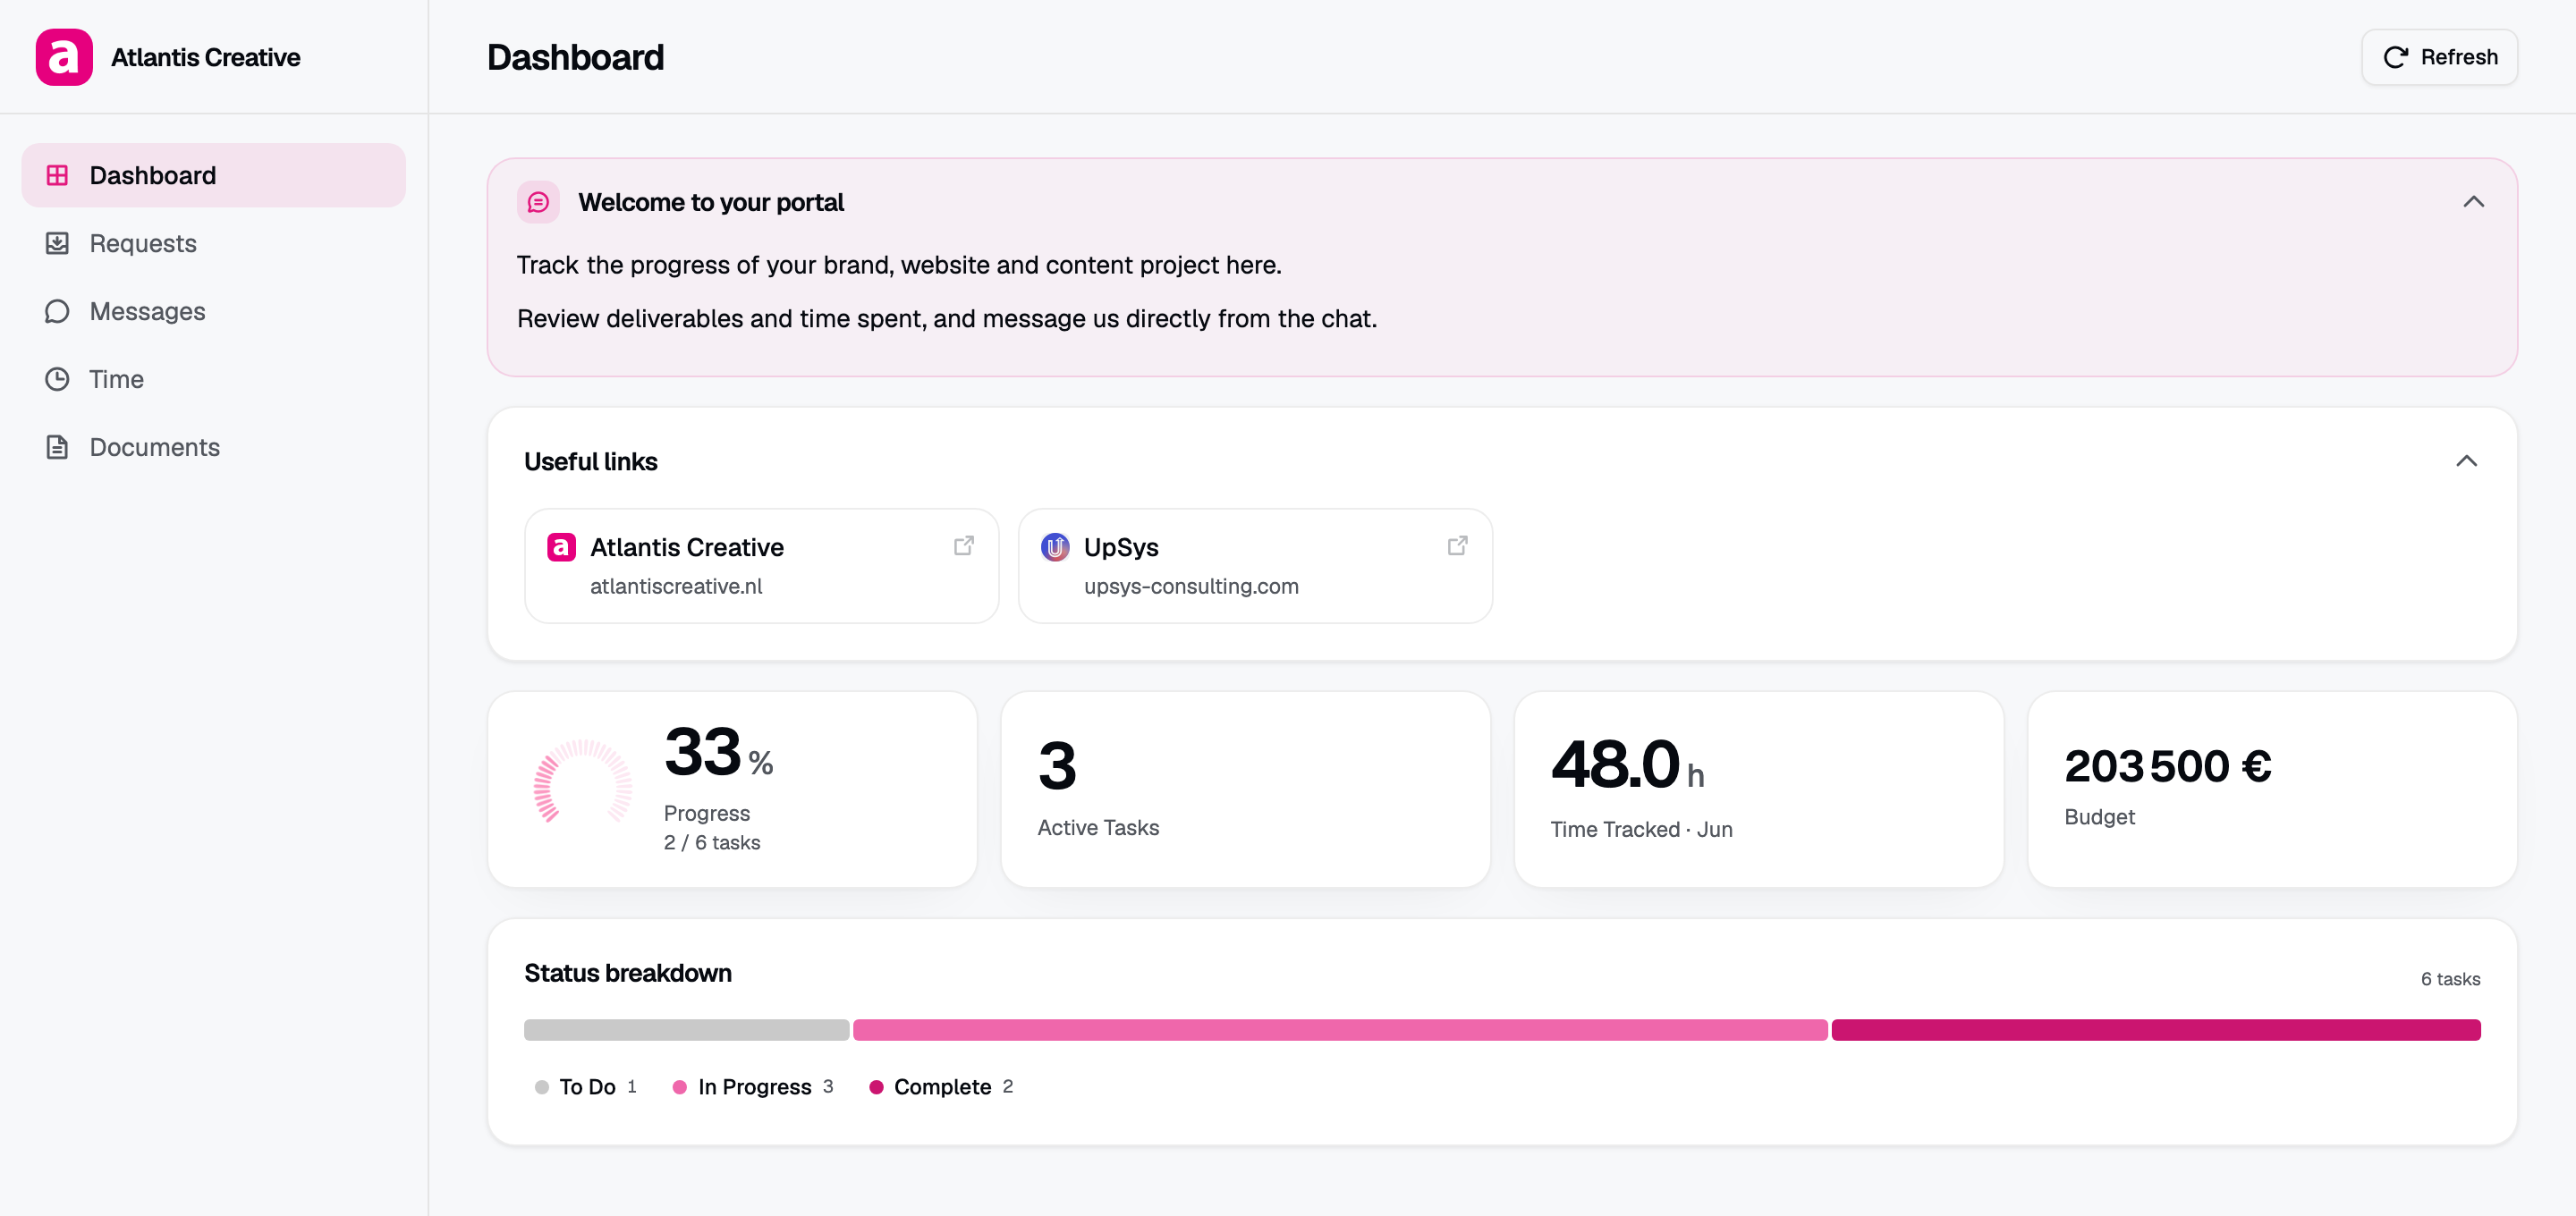
A ClickUp client portal in Client Glance: your client sees progress, deliverables, and time read live from ClickUp, with no ClickUp account.
The page your client opens
A ClickUp client portal is a client-facing page that reads from your ClickUp workspace and shows a single client their own project status, deliverables, time, and updates. It carries your agency’s branding rather than ClickUp’s, and it sits behind a password so only the right people see it.
The difference from ClickUp’s built-in sharing is who the page is for. ClickUp’s interface is designed for the people doing the work. A client portal is designed for the people paying for the work. They see a clean summary of their own project.
The cost of sharing your ClickUp workspace
ClickUp offers a few native ways to show work to outsiders, and each has a catch:
- Public views. You can make a view public, but anyone with the link sees the raw ClickUp layout, and you lose branding and per-client privacy.
- Guest access. Adding a ClickUp guest lets a client into the workspace, but guests can stumble into internal comments, other lists, and an interface they did not ask to learn. Guest seats also add cost as your client list grows.
- Manual exports. Screenshots and status docs go stale the moment a task moves.
For client management at scale, none of these give you a private, branded, always-current view per client. That is the gap a dedicated ClickUp client dashboard fills. For a wider look at the category, see our guide to client portal software for agencies.
Create a ClickUp client portal in 5 steps
Here is the full process with Client Glance, which connects directly to ClickUp:
- Connect ClickUp through OAuth. Authorize a read-only connection. Client Glance never edits your ClickUp data, and your access token is encrypted with AES-256-GCM.
- Pick the list or folder. Choose the part of your workspace that holds one client’s project. This becomes the source for their portal.
- Choose the cards. Decide what the client sees: status tracking, deliverables, time tracking, and a messages panel. Turn off anything that should stay internal.
- Add your branding. Set your logo, brand color, and font so the portal reads as part of your agency.
- Set a password and share. Add a password and send the link.
Because the portal reads from ClickUp, it stays current on its own. When a task changes status or a new deliverable is marked done in ClickUp, the client’s dashboard reflects it without any extra step from you.
What to put on a ClickUp client dashboard
A good ClickUp client dashboard answers the questions a client actually asks, and nothing more. The cards worth showing for most agencies:
- Status overview. A simple view of what is in progress, blocked, and done, mapped from your ClickUp statuses.
- Deliverables. The concrete outputs the client is paying for, with their current state.
- Progress. A single gauge that rolls up how far along the work is.
- Time tracking. Useful for retainer clients who want to see hours against a budget. Hide it for fixed-scope clients.
- Messages. A place for the client to ask questions without a new email thread.
Keep it focused. The value of a portal is that it shows the signal, not every task. You decide the cards per client, so a retainer client and a one-off project client can each get the right view.
ClickUp client portal template vs a dedicated tool
Searching for a “ClickUp client portal template” usually turns up dashboard templates you build inside ClickUp. These can help your team organize client work, and they are worth using for internal structure.
But a template still lives inside ClickUp. The client either needs guest access to see it, or you screenshot it. It looks like ClickUp, not like your agency, and you cannot password-protect a single client’s slice cleanly.
A dedicated tool reads the same ClickUp data and turns it into a portal: branded, password-protected, and scoped to one client. If you already keep your client work tidy with a template, a portal is the layer that makes it client-ready.
Keeping client data private
When you connect ClickUp to any external tool, privacy should be the first question. Client Glance uses a read-only connection, so the portal can show work but never change it, and the access token is encrypted at rest with AES-256-GCM. A portal is scoped to the list or folder you pick, so one client can never see another client’s work.
You can read more about how connections and access are handled in the help center, and follow what ships on the changelog.
Frequently asked questions
Can you create a client portal in ClickUp? Not a true client-facing one on its own. You can share a view or add a guest, but both expose the ClickUp interface. To give clients a branded, read-only dashboard, connect ClickUp to a portal tool that reads your tasks and presents them on their own page.
Do clients need a ClickUp account? No. The portal reads your workspace through a read-only connection and renders the work on a password-protected page. Clients open a link and never sign in to ClickUp.
Is a ClickUp client portal template enough? A template organizes work for your team, but it still lives inside ClickUp and looks like ClickUp to the client. A dedicated portal adds branding, a password, and per-client control over what is visible.
How long does setup take? About 60 seconds: authorize ClickUp, pick the list or folder, choose the cards, set branding and a password, and share the link.